- Home Page
- Scissor Cutting Skills
- How To Hold Scissors Correctly
How To Hold Scissors Correctly
Does your child know how to hold scissors correctly?
Cutting with scissors is a fundamental fine motor skill, which lays the
foundation for better pencil control for better handwriting. But only if
your child is holding the scissors correctly!
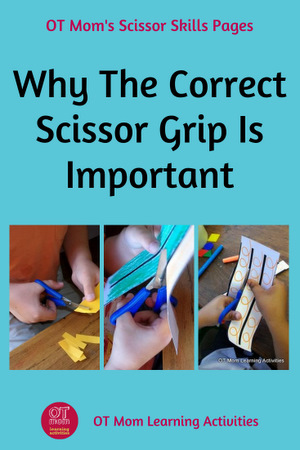
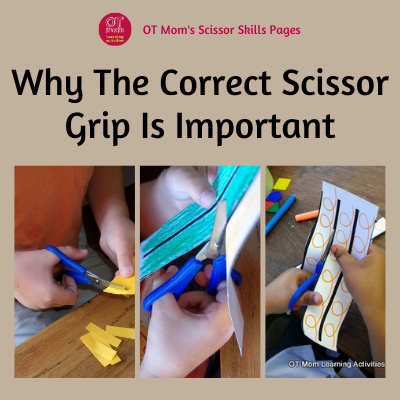
The correct scissor grip is important - read on to find out why it matters, and how to help your child.
Remember, if you are at all concerned about your child's scissor cutting skills, please do speak to an occupational therapist. This website is not a substitute for occupational therapy!
Why Is The Correct Scissor Grip Important?
When your child is learning to write, the thumb, index and middle fingers should be controlling the pencil. I call them the tripod fingers.
The ring and little fingers should be curled up on the side, providing stability and strength to the hand (the technical name for this is ulnar stability).
On the picture alongside, you can see the tripod fingers holding the pencil, with the ring and little fingers curled up loosely for stability on the side.
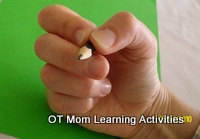 Tripod pencil grip, with ulnar stability
The split between mobility on one side of the hand and stability on the other side of the hand is very important for good pencil control and, ultimately, handwriting skills.
Cutting with scissors can provide lots of practice at getting this split between stability and mobility. Here's how:
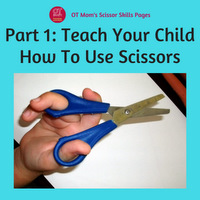
When your child learns how to hold scissors, the thumb, index and middle fingers are the fingers which need to be opening and closing the scissors. That way, they are getting lots of practice at working together.
And when the ring and little fingers are curled up loosely alongside, they are getting practice at providing stability to the hand.
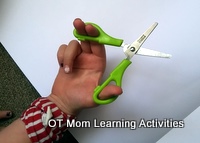 Correct scissor grip, with ulnar stability
This picture shows a child who is cutting without good ulnar stability - the ring and little fingers are sticking out.
If your child holds the scissors like this, then pop a little piece of paper (or other small item like a paper clip) under the ring and little fingers.This will remind your child to hold the fingers in place so the paper does not fall out.
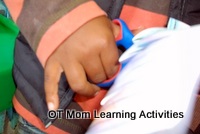 poor ulnar stability
How To Hold Scissors With Different Handles
Now that we have established that it is the thumb, index and middle fingers that need to go through the holes in the scissor handles, the question is... how to hold scissors with different styles of handles?!
So let's have a look at some different styles of kiddie scissors that we often see on the market:
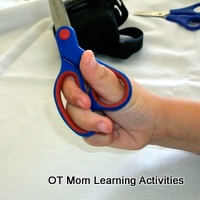 Round And Oval Holes: thumb through round hole; middle and index fingers through oval hole.
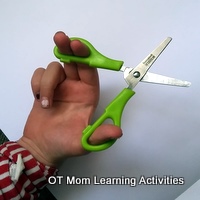 Two Oval Holes: thumb through one hole; index and middle fingers through the other hole.
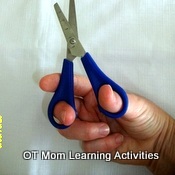 Two Round Holes: thumb through one hole; middle finger through other. Index finger on outside for stability.
The scissors you use will depend on your budget, and what you have available, as well as the age and skill of the child.
Generally, younger children, or those with poorer skills, need to put both the index and middle fingers through the same hole. Older or more skilled children can use scissors with small holes for the thumb and middle finger, with the index finger on the outside to help stabilize the scissors.
But what we DON'T want, from an occupational therapy perspective, is all the fingers moving together, so avoid scissors with very large holes that all the fingers can fit through.
As adults, we often have to use large scissors with large holes in the handles for all our fingers to fit through, and that is absolutely fine. But the reason why we focus so much on getting kids to use their tripod fingers to grip the scissors, is because their fingers need all the practice they can get in preparation for writing. Especially if their fine motor skills are poor.
So, helping your child learn how to hold scissors for maximum fine motor benefit will help them tremendously in the long run!
The "Two Thumbs Up!" Guideline
People use lots of analogies to help kids learn how to hold scissors and how to cut along a line. Crocodiles, driving the car along the road...
But I have found that a really effective guideline is the "Two Thumbs Up!" guideline.
This guideline can help kids to remember how to hold scissors AND the paper in the most effective way.
The pictures below show kids who are holding the paper down on the desk, and their thumbs are below the paper. Holding the paper like this often happens when kids are new to cutting out, or when their coordination skills are poor (so they can't figure out how to use both hands together well).
Poor Cutting Technique - Thumbs Below Paper
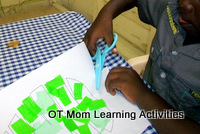
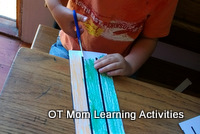
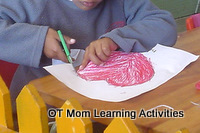
If your child is doing this, you can ask your child to give you "Two Thumbs Up" before starting the scissor task.
Two Thumbs Up:
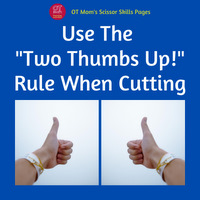 Put Two Thumbs Up
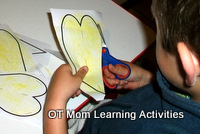 Cutting out with "two thumbs up" - Hold the paper and scissors with the thumbs on the upper side
This will help your child remember to hold the paper up in front of them, which comes more naturally when the thumb is ABOVE the paper, and the scissors are being held with the thumb hole on top.
And then take some time to work on bilateral coordination skills to help them use both hands together well.
Left Handed Children
If you want to teach your left handed child how to hold scissors correctly, it is very important that you provide left handed scissors like these ones from Lefty's#Ad.
After that, all the principles of how to hold scissors apply in exactly the same way!
Read my article about how left handed scissors work, and why all left handed children should have left handed scissors.
I hope you found this page helpful!
If you want all my scissor cutting information in an accessible download, please take a look at my Scissor Skills E-Book!
And if you want to stay in touch with new pages on my site, please do sign up for my occasional newsletter!
- Home Page
- Scissor Cutting Skills
- How To Hold Scissors Correctly
Share this page to help others!
Related Pages and References
Feel free to browse the scissor pages on my site to get tips and activities to help your child develop better cutting skills!
References
Mitchell, A. W., Hampton, C., Hanks, M., Miller, C., & Ray, N. (2012). Influence of task and tool characteristics on scissor skills in typical adults. American Journal of Occupational Therapy, 66, e89–e97. https://dx.doi.org/10.5014/ajot.2012.004135
Ratcliffe, I., Concha, M. & Franzsen, D. (2007). Analysis of cutting skills in four and six year olds attending nursery schools in Johannesburg. South African Journal of Occupational Therapy. 37. 4-9.
Ratcliffe, I., Franzsen, D., & Bischof, F. (2010). Development of a scissors skills programme for grade 0 children in South Africa - A pilot study. South African Journal of Occupational Therapy. 41. 24-31.
Smith, Barbara A. MS, OTR/L. From Rattles to Writing – A Parent’s Guide to Hand Skills. 2011. Therapro Inc.
Didn't find what you were looking for? Try a search of my site!
